
Blog
Fix Parking Sensors in Under 10 Minutes, Car Owners
Clean sensor faces, do the click test, and reset first. Most issues clear in under 10 minutes. If not, run swap tests, check wiring, and book ADAS...
Start with the cheap fixes: clean the sensor faces, run a click test, and power-cycle the system. That clears the majority of cases owners bring us. If a simple reset doesn’t hold, or the dashboard shows a Park Assist fault that returns after clearing, you’re looking at a wiring, mounting, or module issue that needs a diagnostic scan. Persistent trouble codes or more than one dead sensor usually means it’s time for a shop, not another YouTube fix.
TL;DR:
Dirt, ice, or wax buildup on sensors can silence the system, and cleaning the sensor faces with isopropyl alcohol often restores proper function.
Power-cycling the system or disconnecting the battery for 10 to 15 minutes can clear software glitches, but persistent faults often indicate hardware issues.
Live data scans and swap tests identify whether faults follow the sensor or stay at the mounting point, guiding whether replacement or wiring repairs are needed.
Damage from impacts, bumper removal, or poor installation may require recalibration after repairs to ensure sensors function correctly.
DIY fixes are limited to cleaning and resets; complex issues like wiring faults or internal sensor failure demand professional diagnostics and OEM-guided calibration.
Table of Contents
Why Are My Parking Sensors Silent? Start With Quick Owner Checks
What Happens During a Professional Diagnostic and Calibration Visit
Book a Diagnostic and Calibration Appointment With Car Geeks Collision
Why Are My Parking Sensors Silent? Start With Quick Owner Checks
Most parking sensor complaints trace back to something you can fix in your driveway in under ten minutes. Before you assume a sensor is dead, work through the basics.
Ultrasonic sensors are unforgiving about what sits in front of them. Road film, brake dust, ice, or a coat of wax can dampen the ultrasonic pulse enough to silence the whole system, since these sensors depend on a clean signal path to bounce sound waves back accurately.
Wipe each sensor face with isopropyl alcohol and a soft cloth. Skip the high-pressure washer, since forced water can work past the seals and degrade the transducer over time.
Run the click test: engine or ignition on, transmission in reverse, parking brake set. A working sensor gives off a faint, rapid vibration you can feel with a fingertip pressed lightly against the bumper, since functioning units pulse in the 40 to 60 kHz range, too high to hear but easy to feel.
Check the dashboard for a Park Assist toggle that got switched off accidentally, and glance at the fuse box for anything labeled PDC or distance sensor.
Look at the bumper fit itself. A loose license plate holder, an aftermarket tow hook, or a poorly seated bumper cover can physically block the sensor’s field of view.
Owners often assume a silent system means a dead sensor, when the real culprit is a disabled setting or a blown fuse that takes thirty seconds to check.
Reset Methods That Often Clear Software Glitches
If the sensors passed the click test but the warning chime still won’t behave, a reset often clears whatever transient fault is confusing the module. Work through these in order, from least to most invasive:
Power-cycle the Park Assist button. Hold the dash button for about ten seconds. Some models need this cycled up to ten times to fully reset.
Disconnect the negative battery terminal for a sufficient period to fully power-cycle the system. This is the deeper reset, and it clears more than just the parking sensors. It resets that timing window can also erase radio presets, seat memory positions, and stored idle-relearn values, so don’t do this casually.
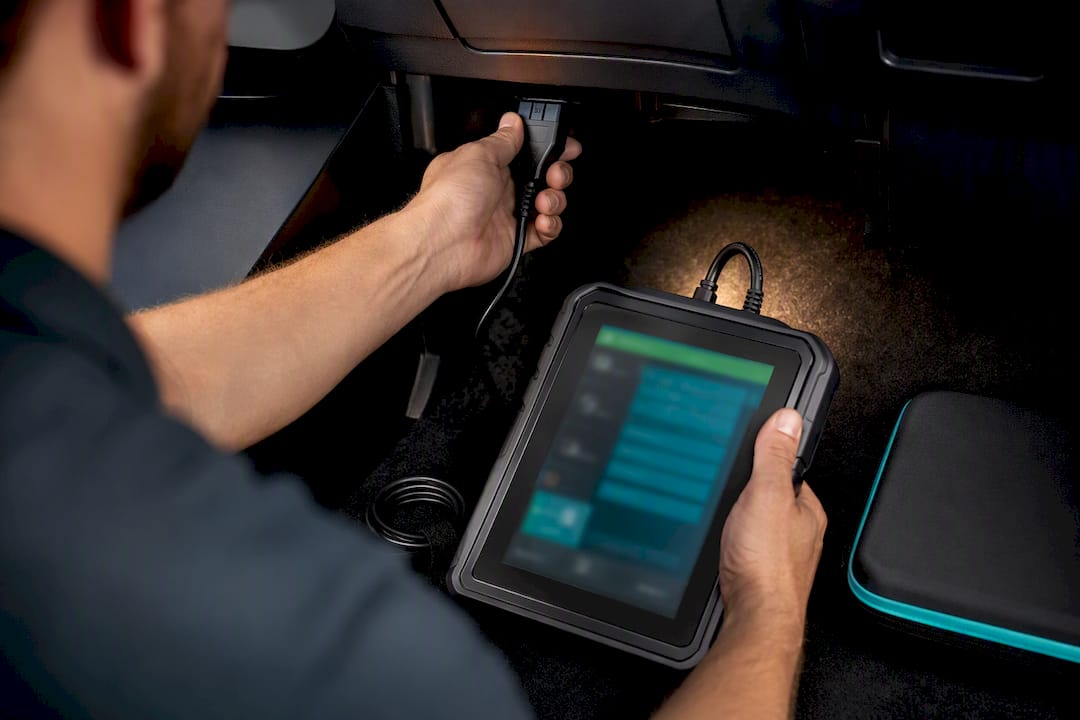
Scan for stored codes with an OBD2 tool that can reach body or chassis modules, not just the engine bay. Many basic code readers only see powertrain codes and miss Park Distance Control (PDC) faults entirely.
Clear the codes and retest. If the same DTC comes right back, the reset didn’t fix anything real. That’s your signal the problem is hardware, not software, and no amount of battery disconnecting will change that.
A reset that holds means you were dealing with a glitch. A reset that doesn’t hold means you’re dealing with a part.
How Do You Diagnose an Intermittent Parking Sensor Fault?
When cleaning and resets don’t stick, the fault usually lives in one of three places: the sensor itself, the wiring harness, or the module reading the data. A methodical process narrows it down without replacing parts you don’t need.
Start by reading live values with a scan tool capable of pulling module data, not just fault codes. Walk a target object toward the bumper while watching the response on each sensor channel. A healthy sensor shows a smooth, decreasing distance reading as the object approaches. An erratic, jumping trace points to a failing sensor. A stable reading that’s simply wrong by a consistent offset usually points to a mounting or alignment problem instead.
Next comes the swap test. Move a suspect sensor to a known-good position on the bumper, ideally the opposite side for symmetry.
If the fault follows the sensor to its new spot, the sensor itself is bad.
If the fault stays behind at the original mounting location, the wiring or the mount is the real issue, not the part you just moved.
With the system active, probe for voltage at the sensor’s connector to confirm it’s even getting power. No voltage means you’ve found a harness break before you’ve wasted an hour chasing a phantom sensor fault.
Then inspect the mounting itself. Look at the decoupling ring, the rubber isolator that lets the sensor vibrate without the whole bumper interfering with the signal. A folded, cracked, or missing ring is one of the most common causes of false alarms that gets misdiagnosed as a bad sensor. Check whether the sensor sits flush and centered, or if it’s tilted or recessed from bumper damage. Look for water staining or greenish corrosion at the connector, and check for a crushed harness where the bumper meets the fender liner, a common spot for pinched wires after body work.
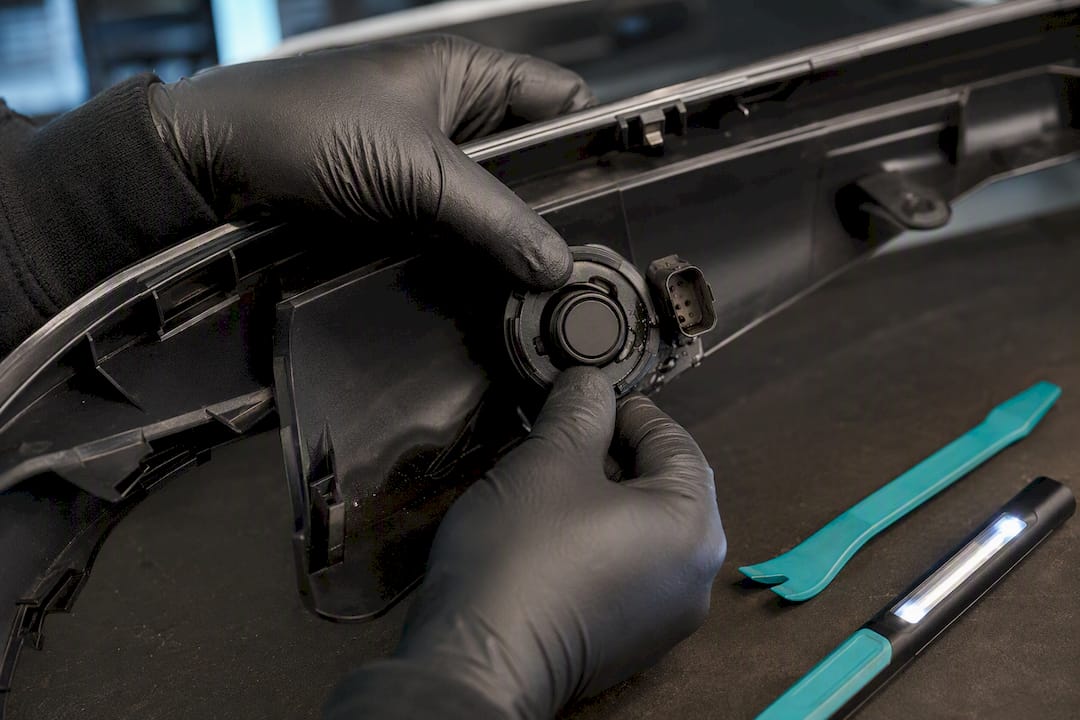
Pro Tip: Corrosion and moisture intrusion behave differently depending on the weather. A sensor that works fine on a dry day but drops out after rain almost always points to a connector problem, not the sensor itself. Dry it out, clean the contacts, and retest before you condemn the part.
Should You Repair, Replace, or Call a Shop?
The click test and swap test together tell you almost everything you need to know before spending a dime on parts.
If a sensor clicks, has power at the connector, and the fault follows it during a swap, you’re looking at internal sensor failure. That’s a straightforward, low-risk replacement. If you see multiple dead sensors at once, DTCs scattered across different channels, or the failures started right after a fender-bender or bumper scrape, you’re probably dealing with harness or module damage rather than a single bad part.
Single sensor, confirmed by swap test: sensor replacement, generally a same-day repair.
Multiple sensors down, or codes across several channels: harness or module inspection required.
Failures that began after any impact, however minor: check for hidden bumper damage before assuming it’s just the sensor.
Bumper removal is often necessary for a proper repair, since sensors and their wiring routes are buried behind the cover on most vehicles. If the bumper was removed, reinstalled, repainted, or replaced for any reason, expect that the vehicle may need ADAS recalibration before the sensors report accurately again, since skipping that step is a common reason systems keep throwing false readings even after a seemingly clean repair. A single sensor swap typically runs a shop visit of an hour or two; harness repair or calibration work can stretch to a half or full day. If you need the car in the meantime, disabling the Park Assist warning temporarily is a reasonable stopgap, not a permanent answer.
What Happens During a Professional Diagnostic and Calibration Visit
A proper shop visit starts with OEM-guided diagnostics, pulling module live values and running DTC-guided test plans rather than guessing from a beep pattern. That’s how a technician tells a mounting issue from an internal sensor failure without swapping parts unnecessarily.
From there, the work might involve bumper removal, harness repair with soldered and sealed connections, sensor replacement, and calibration using the tools the OEM procedure calls for. Bring whatever you’ve already gathered: stored DTC codes, recent repair history, and photos of the affected area. You should walk away with a diagnostic report and, if calibration was performed, documentation confirming the system was verified against factory specifications.
What Every Shop Wishes DIYers Knew About Sensor Repairs
The mistakes we see most often aren’t about skill, they’re about skipping steps. Someone paints a replacement sensor to match the bumper and doesn’t realize the extra coating thickness changes how the ultrasonic pulse travels, which throws off distance readings permanently. Someone else does perfectly good bumper work but skips recalibration afterward, so the sensors are physically fine and functionally wrong.
The pattern we trust least is guesswork. A live-data check followed by an actual drive test, not just “it beeped in the driveway,” is the only way to confirm a fix holds under real conditions.
— Car Geeks Collision
Book a Diagnostic and Calibration Appointment With Car Geeks Collision
If cleaning, the click test, and a reset haven’t solved it, Car Geeks Collision handles the next step: full diagnostic scanning, harness repair, sensor replacement, and ADAS calibration using OEM-guided procedures.
Unlike a quick-lube shop bolting on a generic sensor, we work through the same swap tests and live-data checks outlined above before we touch a part, so you’re not paying to replace something that was never broken. We coordinate directly with insurance carriers when the fault traces back to a collision, and courtesy loaner vehicles may be available when your car needs to stay with a shop for calibration or harness work. Before your visit, jot down any dashboard codes you’ve seen, note when the fault started, and snap a photo of the affected bumper area. Then book your ADAS calibration and sensor diagnostic appointment or explore our full collision and auto body services to get your parking sensors reading accurately again.
Sources
This guide draws on OEM technical service bulletins, ultrasonic PDC engineering explainers, and shop-tested reset and troubleshooting procedures, including guidance from CarParts.com, Hella TechWorld, and AutodataPlug.
Technical service bulletin: parking assistance provides false warnings (OEM/TSB)
Diagnose Faulty Parking Sensors: No Sound or False Alarms - AutodataPlug
FAQ
How do you reset parking sensors?
Hold the dashboard Park Assist button for about ten seconds to power-cycle the system, or disconnect the negative battery terminal for 10 to 15 minutes for a deeper reset that also clears other stored settings.
What causes parking sensors to stop working?
Common causes include dirt, ice, or wax blocking the sensor face, a disabled Park Assist setting, a blown fuse, a folded decoupling ring, connector corrosion, or an internal sensor failure confirmed by a swap test.
How do you reset car sensors?
The same power-cycle and battery-disconnect methods used for parking sensors work for most related chassis sensors, though persistent faults still require an OBD2 scan targeting body or chassis modules to clear stored trouble codes.
Can I drive with parking sensors not working?
Yes, it’s legal to drive with a non-functioning parking sensor system, but you lose the audible distance warning, so rely on mirrors and a backup camera if equipped, and get it diagnosed soon since the fault can point to hidden bumper or wiring damage.
Recommended