
Blog
Clear Coat Peeling Repair: DIY Steps and When to Call a Pro
Learn how to tackle clear coat peeling repair effectively with DIY steps. Discover when to fix it yourself and when to call in a pro.
A small patch of peeling clear coat, isolated and surrounded by solid, well-adhered finish, is a fair candidate for a weekend DIY stopgap. Widespread peeling, lifting at multiple edges, or any spot where you can see bare basecoat or primer means you need a professional panel respray, not a rattle can. Clear coat peeling repair done at home buys you time and improves curb appeal; it rarely stops the underlying delamination for good.
Here’s how to check a spot right now. Run a fingernail gently across the edge of the peeling area. If it catches or lifts further, the surrounding clear is already failing and a spot fix won’t hold. Look at the panel under direct sunlight or a shop light at a low angle, since hazy patches and hairline lifting are almost invisible under flat indoor light.
Two rules before you touch anything else:
Don’t polish or buff a peeling area. Mechanical pressure lifts loose edges further and spreads the damage.
Do remove any flakes that are already loose with a plastic scraper or your fingernail, rather than leaving them to catch on a wash mitt or windshield wiper.
What you can realistically expect: a DIY repair on a small, isolated patch can look good for months and protect the basecoat in the meantime. It is a stopgap, not a permanent cure, according to the frank assessment from The Dent Dude’s shop-level breakdown of clear coat repair. A full professional respray, done edge-to-edge on the panel, is the only repair that reliably restores factory-level durability.
Key Takeaways
A durable clear coat peeling repair almost always requires sanding the entire panel and respraying edge-to-edge, since a spot fix rarely stops delamination that’s already spreading under the surrounding clear.
Point
Details
Test before you touch it
Press-test the edges; if clear lifts anywhere nearby, treat it as a panel job, not a spot fix.
DIY works only on isolated patches
One small, contained area with solid surrounding clear is the only real candidate for a rattle-can stopgap.
Never polish a peeling area
Mechanical pressure from buffing lifts loose edges further and spreads the failure.
Multiple panels or exposed metal means call a pro
Widespread peeling, basecoat exposure, or rust are signs a shop respray is the only lasting fix.
Car Geeks Collision handles full resprays
Booth-controlled, OEM-procedure panel resprays with a lifetime workmanship warranty for South Florida drivers.
Table of Contents
What Sanding and Polishing Techniques Make the Repair Look Right?
Get a Professional Clear Coat Assessment From Car Geeks Collision
What Causes Clear Coat to Peel in the First Place?
Clear coat peeling, also called delamination, happens when the clear layer loses its bond to the basecoat underneath and separates. Once that bond fails, the basecoat and eventually bare metal lose their main shield against water, UV rays, and road salt. It’s a structural failure of the paint system, not a surface stain you can wipe away.
Most cases trace back to a handful of well-documented causes. According to Synew Chemical’s technical review of clear coat peeling, the usual suspects are:
UV exposure and oxidation that break down the clear’s resin over years of sun exposure, especially on horizontal panels like the hood and roof.
Trapped solvent in the basecoat that never fully flashed off before the clear went on, creating a weak layer that eventually blisters and separates.
Incompatible product systems, such as mixing a clearcoat from one manufacturer’s line with a basecoat or hardener it wasn’t formulated to bond with.
Poor surface prep or contamination, including oil, silicone, or dust on the panel before spraying.
Over-thick basecoat or clear film build, which cures unevenly and creates internal stress that eventually cracks the bond.
Mechanical damage, like a rock chip or deep scratch that starts a lifting edge which spreads outward over time.
O’Reilly Auto Parts’ guide to paint peeling causes points to the same root issue from a different angle: improper prep and application errors, especially wrong dry times or excess film build, are the most common and most preventable causes.
Leaving peeling clear coat alone doesn’t just look worse over time, it gets more expensive. Once bare basecoat is exposed to weather, oxidation accelerates, and once metal is exposed, rust can set in within weeks depending on climate and salt exposure. What starts as a $40 fix becomes a $1,200 panel repair or a rust-repair job that costs several times that.
How Do You Know If Clear Coat Peeling Is Repairable?
Not every peeling spot needs the same answer. The assessment takes ten minutes and tells you almost everything you need to know.
Inspect under angled light. Walk the panel with a flashlight or stand it in direct sun at a low angle in the early morning or evening. Hazy patches, spiderweb cracking, and lifted edges show up far more clearly this way than under overhead garage lighting.
Check the edges of the peeling area. Press a fingernail against the border where good clear meets bad. If it lifts or flakes further with light pressure, the failure is spreading, not contained.
Look for white or cloudy patches nearby. These often mark early-stage delamination that hasn’t visibly peeled yet but will within months.
Check for basecoat or metal exposure. If you can see color pigment lifting away or bare metal, the damage has moved past a cosmetic problem into a structural one.
Count the affected areas. One clean, isolated patch is a different job than peeling scattered across a hood, roof, and trunk.
Gilroy Blackout’s breakdown of clear coat failure stages frames this well: failure moves from haze, to cloudy patches, to isolated peeling, to large-scale sheet peeling. Early stages often respond to paint correction alone. Large-scale delamination doesn’t.
Use these decision points to sort your car into one of two buckets:
DIY stopgap candidate: one isolated patch, smaller than a few inches across, with clear that doesn’t lift when you press the surrounding edges.
Professional respray required: peeling on multiple panels, edges lifting anywhere you test them, basecoat or metal visible, or cracking that spreads beyond the original spot.
Field guidance from Touch Up Auto Pro’s honest assessment of clear coat repairability puts it plainly: the single most important test is whether the surrounding clear is still well bonded. If it lifts easily anywhere near the damage, the whole panel is the honest scope of the job.
What Tools and Materials Do You Need Before You Start?
Skipping the checklist is the single fastest way to turn a two-hour repair into a three-day mess. Get everything laid out before you crack open a single can.
Safety and ventilation come first. Clearcoat solvents, and especially 2K (two-component) products containing isocyanates, produce fumes that are genuinely dangerous to breathe. You need a respirator rated for organic vapors, not a paper dust mask, along with safety glasses and nitrile gloves. Work in a garage with the door open and a fan pulling air out, never in a closed space.
Sandpaper does the heavy lifting in this job, and grit choice matters more than most first-timers expect:
220 to 320 grit to knock down loose, flaking clear and expose a sound edge.
400 to 600 grit to feather the transition zone so there’s no visible ridge between old and new clear.
800 to 1,000 grit for final feathering before priming, a range AutoZone’s DIY guide to fixing peeling clear coat specifically recommends for a smooth blend line.
1,500 to 2,000 grit for wet sanding the new clear once it cures, ahead of polishing.
On clear coat products, you have three realistic options. A 2K aerosol clear, like the kind sold under the Dupli-Color or Titan Coatings lines, gives you a chemically catalyzed clear that cures harder and holds up closer to factory durability. A 1K rattle-can clear is easier to use and cheaper but stays softer and more UV-sensitive long term; it’s genuinely just a stopgap. A gun-applied 2K clear, sprayed through an HVLP gun like a Vaper HVLP, gives you the most control over film build and finish quality, but it demands more skill and a compressor.
Round out the checklist with wax and grease remover, a tack cloth, isopropyl alcohol for a final wipe, and a compatible primer or sealer if you’ve sanded through to basecoat. Products from Griot’s Garage cover several of these prep steps in one line, including their degreasers and polishing compounds.
Pro Tip: Avoid any polish, wax, or detailing spray with silicone anywhere near your repair area for at least a week before and during the job. Silicone contamination causes fisheyes, the small crater-like defects that ruin a fresh clear coat, and it’s nearly impossible to fully strip once it’s on a panel.
Step-by-Step DIY Clear Coat Repair Workflow
Follow this sequence in order. Skipping steps, especially the degreasing and flash-time steps, is where most home repairs go wrong.
Wash and decontaminate the panel. Use a pH-neutral car soap, then a clay bar if the surface feels rough to the touch.
Remove all loose clear. Sand with 220 to 320 grit until every flaking piece is gone and you’ve reached a sound, well-adhered edge.
Feather the transition zone. Move to 400 to 600 grit, then 800 to 1,000 grit, sanding in a wide taper so there’s no hard line where old clear meets bare basecoat.
Degrease thoroughly. Wipe with wax and grease remover, then isopropyl alcohol, then a tack cloth immediately before spraying.
Spot prime or seal if basecoat is exposed. Skip this step only if you never sanded through to bare basecoat or primer.
Reapply basecoat if needed, matching color as closely as possible, and let it flash fully per the product’s technical data sheet (TDS) before clear goes on.
Spray clear in light, even passes. AutoZone’s guide recommends two to three light coats of a quality 2K aerosol clear rather than one heavy coat, which reduces the risk of runs and improves cure quality.
Respect flash and cure times between coats. Rushing this step traps solvent, the very failure mode that caused peeling in the first place.
Let the repair cure fully before polishing, typically 24 to 48 hours for aerosol 2K products depending on temperature and humidity.
Wet sand and polish once fully cured, working from fine grit up through a polishing compound.
Stage
Grit / Product
Typical Time
Remove loose clear
220 to 320 grit
30 minutes
Feather edges
400 to 800 grit
30 minutes
Final feather before priming
800 to 1,000 grit
a few minutes
Basecoat flash time
Manufacturer TDS spec
Typically a few minutes per coat
Clear coat cure before polish
2K aerosol clear
24 to 48 hours
Wet sand and polish
1,500 to 2,000 grit, then compound
1 to 2 hours
A hard rule that gets skipped constantly: never spray new clear over an edge that’s still actively lifting. It looks fine for a week and then peels again, right at the seam, because you’ve clear coated over a bond that was already failing. Before you commit to the full job, spray a small test area on a hidden panel edge or a scrap piece to check color match and confirm the clear is compatible with what’s already on the car.
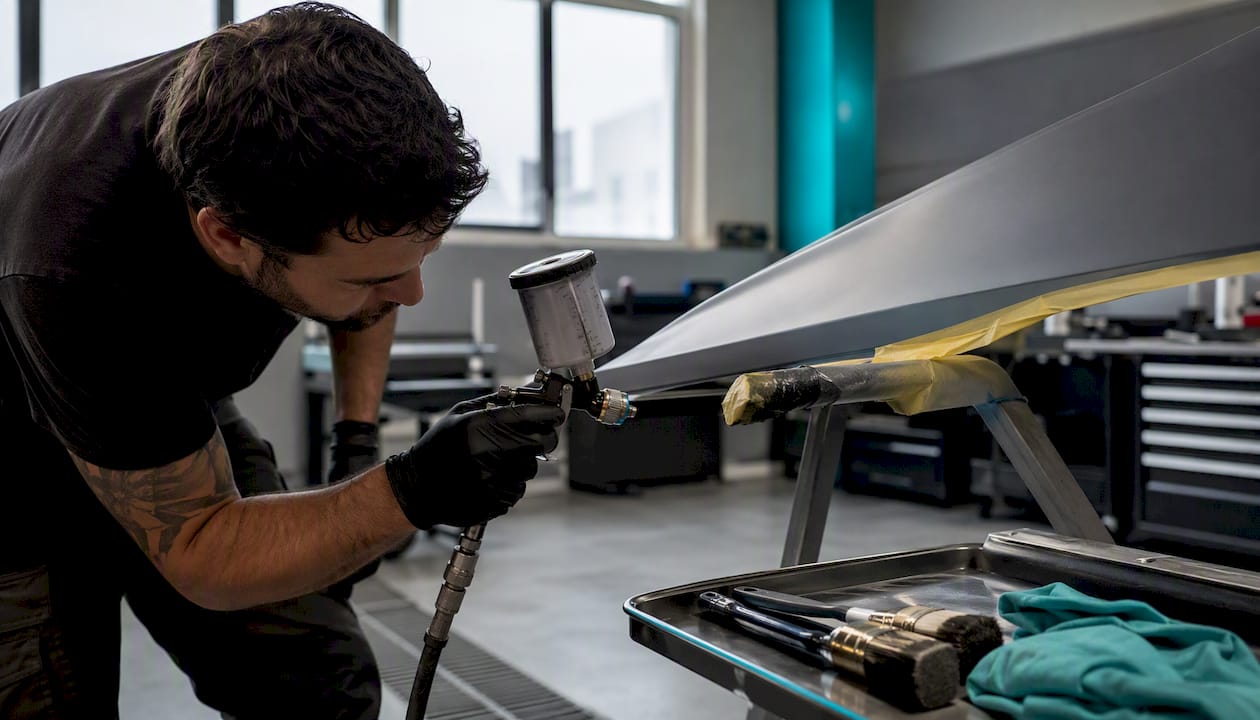
Pro Tip: Keep the garage between 65 and 85 degrees Fahrenheit and low humidity while spraying and curing. Cold, damp air slows solvent flash and can trap moisture under the clear, creating exactly the kind of adhesion failure you’re trying to fix.
What Sanding and Polishing Techniques Make the Repair Look Right?
The difference between a DIY patch that blends in and one that screams “amateur repair” almost always comes down to sanding discipline, not the clear coat product itself.
Wet sanding progression matters more than speed. Start at 1,500 grit to knock down any texture or minor imperfections left by the spray, then move to 2,000 grit to refine the surface further. Each grit step should remove the scratch pattern left by the previous one, not create new depth. Skipping a grit step, jumping from 1,000 straight to 2,000, leaves visible sanding marks that show up under polish.
For polishing, a dual-action (DA) polisher is the safer choice for most home users. A rotary polisher removes material faster and can genuinely correct deeper defects, but it also burns through fresh clear far more easily in inexperienced hands. Pair a foam cutting pad with a compound for the first pass, then switch to a finishing pad and a lighter polish for the final gloss.
The most common DIY mistake isn’t bad spray technique, it’s over-correcting the finish afterward. Buffing too aggressively on a fresh repair, especially near the feathered edge, burns through the new clear or lifts the very edge you just sanded flat. When in doubt, stop a step early and let the repair sit for a few days before a final light polish.
Common errors worth naming directly:
Burning through clear at the edges from too much pressure or too coarse a compound during final polish.
Creating a hard edge at the feather line because sanding stopped too abruptly instead of tapering gradually.
Buffing a loose edge, which reintroduces the exact peeling problem the repair was meant to fix.
If you notice the edge starting to lift again during polishing, stop immediately. Accepting a slightly duller finish on a small area is a better outcome than mechanically reopening the delamination you just repaired.
How Much Does DIY vs. Professional Clear Coat Repair Cost?
Budget and timeline diverge sharply depending on which path you take, and the gap is bigger than most people expect going in.
Approach
Typical Cost Range
Time Investment
DIY spot repair (materials only)
$40 to $150
One weekend, plus 24 to 48 hours cure
Professional panel respray (single panel)
several hundred dollars
1 to 3 days including cure/bake time
Professional multi-panel or full respray
$1,500 and up
Several days to over a week
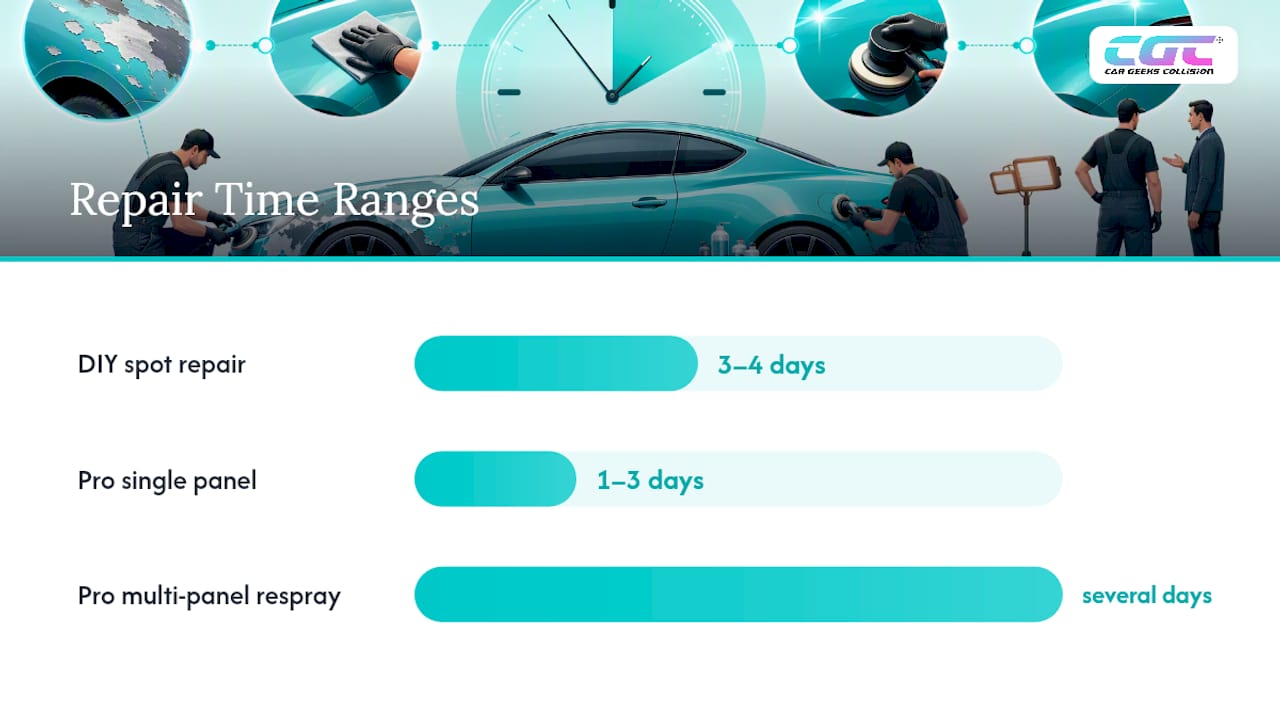
For a DIY repair, your line items are sandpaper in multiple grits, wax and grease remover, tack cloths, a 2K aerosol clear, and possibly a matching basecoat touch-up if you sanded through. Materials rarely run past $150 for a single small patch, but the real cost is your time and the risk of a redo if prep is rushed.
Professional shops charge more for good reason. A booth-controlled environment eliminates dust and temperature swings that ruin home repairs. Shops use matched product systems mixed to exact ratios, apply accelerated or baked cures that home garages can’t replicate, and respray the full panel edge-to-edge so there’s no visible seam. That labor, equipment, and material-matching cost is baked into the price, and it’s also why a shop repair typically comes with a workmanship warranty that a rattle-can fix never will.
If the peeling resulted from a collision, a hail event, or another insured incident rather than age and UV wear, the process changes. Insurance claims usually require a documented estimate, photos, and sometimes an adjuster inspection before repair work begins, and a shop that handles insurance coordination directly can save you weeks of back-and-forth.
When Should You Hire a Professional for Clear Coat Repair?
A shop-grade respray does things a home garage simply can’t replicate, and knowing the specific gap helps you decide when a DIY attempt is a waste of a weekend.
Professional shops work in a controlled spray booth with filtered airflow, which eliminates the dust contamination that ruins so many driveway repairs. They mix clear and hardener to exact ratios specified by the manufacturer’s TDS, apply matched basecoat and clear systems from the same product line, and often use accelerated or baked cure cycles that reach full hardness in hours instead of days. According to a comparison of professional paint restoration versus DIY approaches, that combination of environment control and proper cure is what gives a professional finish its long-term UV resistance and durability, qualities aerosol products struggle to match.
Clear signs it’s time to bring the car in rather than reach for another can of clear:
Peeling on more than one panel, which usually points to a systemic prep or product issue rather than isolated UV damage.
Basecoat, primer, or bare metal visible anywhere on the panel.
Edges that keep lifting no matter how far back you sand.
Any sign of rust or corrosion starting under the peeled area.
A typical shop workflow for a real respray looks like this: full assessment and color match, complete sanding of the affected panel rather than just the visible patch, basecoat and clear applied edge-to-edge in a controlled booth, a bake or accelerated cure cycle, then wet sanding and machine polish to bring back full gloss. Car Geeks Collision follows OEM repair procedures on every job, which matters even more on panels near sensors, since a respray that disturbs ADAS-related components needs proper calibration afterward to keep safety systems working correctly.
When you get an estimate, bring photos of the damage in daylight, note when you first noticed it, and ask direct questions: does the shop follow the paint manufacturer’s TDS for mixing and cure, what warranty backs the workmanship, and will the repair extend edge-to-edge on the panel or attempt a blend. A shop that hedges on any of those answers is one to walk away from.
Pro Tip: If your vehicle has ADAS features like lane-keep assist or parking sensors near the panel being repainted, ask specifically whether the shop recalibrates those systems after refinishing. Paint and body filler thickness can affect sensor readings, and skipping calibration is a safety issue, not a cosmetic one.
How Do You Prevent Clear Coat Peeling From Coming Back?
A repaired panel, whether it’s your DIY patch or a fresh shop respray, is more vulnerable to UV and chemical damage in its first few months than the rest of your paint. Treat it accordingly.
Stick to a regular wash schedule using pH-neutral soap and a microfiber mitt, and avoid automatic car washes with abrasive brushes for at least a month after any repair. Choose polishes and sealants free of harsh solvents, and hold off on any compounding near the repaired area until the clear has fully cured and hardened, generally 30 days for most 2K products.
For long-term protection, a synthetic paint sealant lasts a few months and offers decent UV and chemical resistance for the price. A ceramic coating costs more upfront but forms a harder, longer-lasting barrier, typically one to three years depending on the product, and does a better job resisting the oxidation that starts the peeling cycle in the first place. Neither product fixes existing delamination. Their job is slowing the next failure, not reversing damage that’s already happened.
Where you park matters more than most owners realize. Consistent sun exposure on one side of the car, or regular exposure to road salt in winter climates, accelerates the same UV and corrosion mechanisms that cause peeling. A carport or garage, even a basic one, meaningfully extends the life of both original and repaired clear coat. For broader guidance on protecting paint day to day, Car Geeks Collision’s guide to protecting your car’s paint from scratches and chips covers habits that reduce the mechanical damage that often starts a peeling edge.
If you’ve done a DIY repair, check the edge of the patch every few weeks for the first three months. Catching a new lift early, before it spreads, is the difference between a quick touch-up and starting the whole repair over.
Is a DIY Clear Coat Fix Actually Worth It?
Realistic numbers matter more than optimism here. A well-executed DIY spot repair on a genuinely isolated patch can look clean and hold up cosmetically for a season or two. But a stopgap fix rarely halts the delamination happening at a microscopic level under the surrounding clear, and it commonly shows a new lift right at the seam within a matter of months, not years.
That doesn’t make DIY worthless. If the damage is truly one small area, contained, with clear that doesn’t lift anywhere you test it, spending an afternoon and $80 in materials is a reasonable bet. What doesn’t make sense is spending that same afternoon on a car with peeling in three spots and lifting at every edge you press. That’s not a repair, it’s a delay, and the delay usually costs more once basecoat exposure turns into surface rust.
The instinct to reach for a rattle can first is understandable. It’s cheap and it’s immediate. But the honest tradeoff is this: DIY buys cosmetic time, a professional respray buys durability. If your car’s peeling has already reached basecoat or if it’s showing up on more than one panel, the smartest move isn’t a better spray technique, it’s protecting the metal underneath before rust turns a paint problem into a structural one.
Get a Professional Clear Coat Assessment From Car Geeks Collision
If your assessment points to a full panel respray rather than a weekend patch, Car Geeks Collision gives South Florida drivers a shop-grade alternative to guessing with a rattle can. We work with matched product systems, booth-controlled application, and OEM repair procedures on everything from daily drivers to Porsche, Bentley, and electric vehicles, so the fix actually addresses the delamination instead of masking it for a season.

Bringing your car in for an estimate is straightforward. Photos of the damage in daylight help us scope the job before you even arrive, and if the peeling stems from a collision or storm event, we coordinate directly with your insurance carrier and can arrange courtesy towing. Tell us what outcome you’re hoping for, whether that’s a single-panel blend or a full respray, and we’ll walk you through the realistic timeline and what our lifetime workmanship warranty covers. Explore our auto body repair and collision services or, if your vehicle is electric, check our dedicated EV and Tesla body repair page. Reach out today to schedule an estimate and find out whether your peeling clear coat needs a patch or a proper respray.
Where to Learn More Before You Start
A few outside resources are worth bookmarking before you commit to a repair path, especially if you’re sourcing products or double-checking technique.
AutoZone’s step-by-step DIY guide walks through the aerosol repair process with specific grit and coat-count guidance.
O’Reilly Auto Parts’ breakdown of paint peeling causes is useful for diagnosing whether prep or product incompatibility caused your specific failure.
Synew Chemical’s technical review of clear coat peeling goes deeper into the chemistry behind trapped solvent and incompatible systems.
Gilroy Blackout’s clear coat failure stages guide helps you place your damage on the haze-to-peeling spectrum before deciding on a fix.
Express Lube Arlington’s overview of the accident repair process explains what to expect if your peeling stems from a collision claim.
Diamond Brite’s guide to ceramic coatings covers protective coating options worth considering once your repair is complete.
Sources
FAQ
Can Clear Coat Peeling Be Repaired?
Yes, but the fix depends on scope. A small, isolated patch can be spot-repaired with sanding and a 2K aerosol clear, while widespread peeling or lifted edges across a panel requires a full professional respray for a lasting result.
Can You Make Peeling Clear Coat Look Better Without a Full Respray?
You can improve the appearance of an isolated peeling spot by sanding away the loose clear, feathering the edge, and applying fresh 2K aerosol clear, though this is a cosmetic stopgap rather than a permanent structural fix.
How Do You Fix Clear Coat Peeling Without Repainting the Whole Panel?
Sand the failed clear back to a sound, well-adhered edge, feather the transition with progressively finer grits, degrease thoroughly, and reapply a matched 2K clear in light coats, but only if the surrounding clear passes a fingernail lift test.
Can You Put New Clear Coat Over Existing Peeling Clear Coat?
No. Spraying new clear over an actively lifting edge traps the failure underneath and it will peel again, usually within months, right at the seam where old and new clear meet.
When Should You Choose a Professional Respray Instead of a DIY Fix?
Choose a professional respray when peeling appears on multiple panels, basecoat or metal is exposed, or edges lift wherever you test them. A shop like Car Geeks Collision applies matched systems in a controlled booth for a durable, edge-to-edge repair backed by a workmanship warranty.
Recommended