
Blog
Airbag Module Reset: Restore SRS Function After a Crash
Learn how to safely restore SRS functions after a crash with a professional airbag module reset. Ensure all hardware is replaced first.
After a deployment, the correct path is a professional bench reset — but only after every deployed airbag, pretensioner, and impact sensor has been physically replaced. Skip that repair step, and a reset produces a car that looks protected but isn’t. Most bench services turn modules around within a few days for a cost much lower than dealer replacement, and a reputable provider backs the work with a warranty or money-back guarantee.
Your immediate next steps:
Confirm hardware replacement first. All deployed inflators, seatbelt pretensioners, and crash sensors must be replaced by a qualified collision shop before any reset is attempted.
Do not drive with the SRS light on. The entire restraint system is likely offline, meaning airbags will not deploy in a subsequent crash.
Choose a shop or service that bench-tests and verifies the module after clearing — not one that simply plugs in a scanner and calls it done.
Typical bench clear pricing runs well below dealer replacement, which can be considerably more expensive depending on the vehicle. Expect a 24–72 hour bench turnaround for most modules, and ask for a written warranty covering the reset work.
Key Takeaways
A professional bench reset is safe and effective only when performed as the final step of a verified collision repair — after all deployed hardware is replaced and the module passes bench self-test.
Point
Details
Repair hardware first
Replace all deployed inflators, pretensioners, and sensors before any reset is attempted.
Bench clear vs. scanner
Standard OBD-II tools cannot clear hard crash data; only bench-level EEPROM access works.
Typical turnaround and cost
Most bench clears complete within a few days and cost considerably less than dealer replacement.
Demand verification
Always request a written bench test report and warranty before accepting a returned module.
Car Geeks Collision
Handles the full post-accident workflow — OEM repair, ADAS calibration, and module verification — in South Florida.
Table of Contents
How do you choose a legitimate reset provider or collision shop?
Why coordinated repair and ADAS calibration matter after a deployment
What does an airbag module reset actually change?
The SRS control module — sometimes called the ACU (Airbag Control Unit) — stores two fundamentally different types of fault data, and confusing them is where most DIY attempts go wrong.
Soft SRS codes are volatile fault records: sensor communication errors, low-voltage warnings, connector faults. A bi-directional professional scan tool can clear these, and they disappear when the underlying fault is corrected. Soft codes can often be cleared with a capable scan tool, but that is where standard tool capability ends.
Hard crash data is a different matter entirely. When the module detects a deployment event, it writes a crash flag to non-volatile EEPROM memory — a protected memory block that is specifically designed to survive power loss, battery disconnects, and fuse pulls. Disconnecting the battery or removing fuses will not clear crash-event records because the data lives in memory that does not depend on vehicle power to retain its contents. That is why the SRS light stays on even after you’ve replaced the battery or reset the fuse box.
Clearing hard crash data requires bench-level EEPROM access. A professional service physically removes the module, connects it to bench power and specialized hardware, reads the protected memory blocks, rewrites the crash flag, and recalculates the checksum so the module’s internal verification passes. Standard diagnostic tools at auto parts stores cannot perform this operation — they read and clear only the soft, volatile layer.
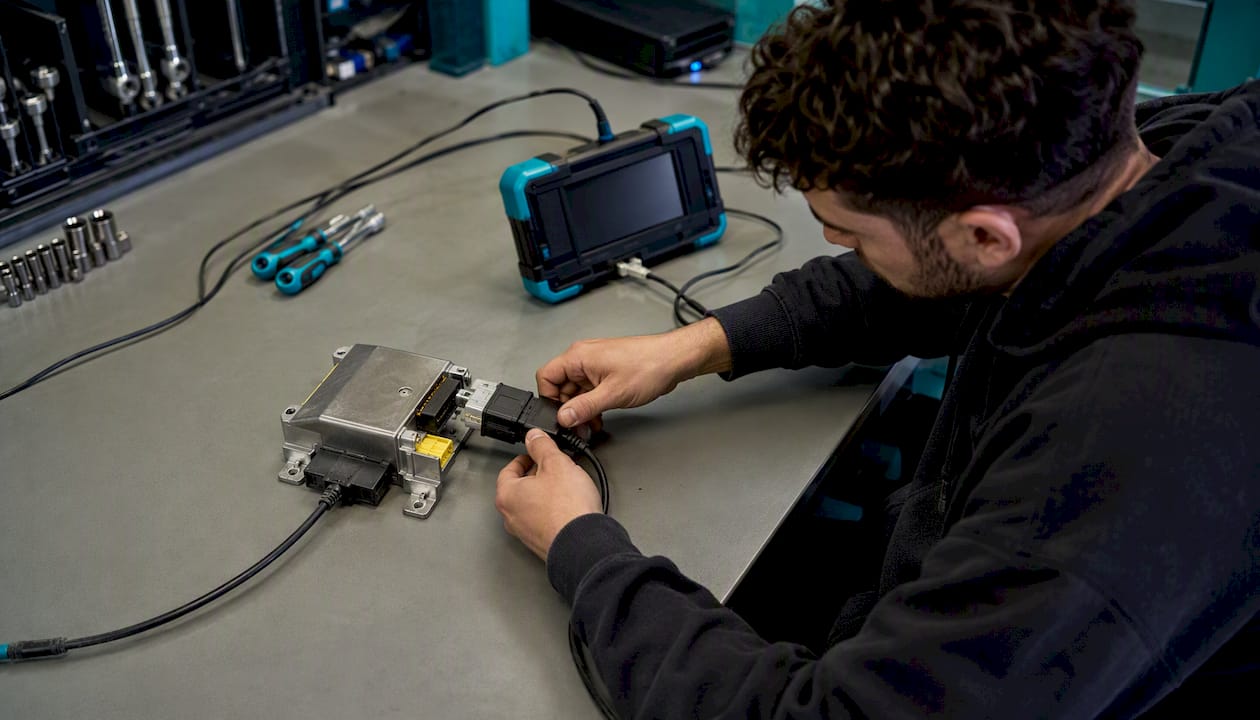
The practical takeaway: if your SRS light came on during a crash event, an OBD-II scanner from AutoZone or a generic code reader will not fix it. The data is locked in hardware-level memory, and getting it out requires the right bench tools and expertise.
When is a reset appropriate, and why does it matter?
A bench reset is the right call when the module itself is electrically healthy — no water intrusion, no burned traces, no cracked housing — and all the deployed pyrotechnic hardware has already been replaced. That sequencing is non-negotiable. Resetting a module before replacing deployed components produces a vehicle that clears inspection visually but offers zero restraint protection in a second collision.
Beyond the safety argument, there are real practical consequences to leaving crash data uncleared:
SRS system stays disabled. The module holds the entire restraint network offline until crash data is cleared. Airbags, pretensioners, and side curtains will not deploy.
Failed safety inspections. Many states include SRS system checks in annual vehicle inspections. A lit SRS warning light is a straightforward fail.
Insurance and liability exposure. An insurer reviewing a claim after a second accident may deny coverage or reduce a payout if documented crash data shows the SRS system was known to be offline. Reviewing accident reporting procedures after a crash helps establish the documented repair chain that protects you.
Resale and registration problems. Crash data in the module is visible to any shop that scans the vehicle, affecting trade-in value and potentially flagging the car during a pre-purchase inspection.
Functioning airbags are among the most consequential safety systems in a modern vehicle. The NHTSA has documented that frontal airbags reduce driver fatalities in frontal crashes by 29% — a figure that only holds when the SRS system is actually armed and operational. A module sitting on uncleared crash data means that protection is gone.
How does a professional bench reset work?
The bench reset process is more involved than most vehicle owners expect, which is exactly why it cannot be replicated with a handheld scanner. Here is the standard workflow a reputable service follows:
Receive and inspect the module. The technician visually checks for physical damage: cracked housing, corrosion, burn marks from deployment current spikes, or evidence of water intrusion. Modules that fail this inspection are flagged for replacement, not clearing.
Bench power-up and EEPROM dump. The module is connected to a bench power supply and specialized hardware that accesses the EEPROM chip directly. The full memory contents are read and archived — this preserves the original crash record before any changes are made.
Locate and rewrite the crash flag. The technician identifies the specific memory address holding the crash-event flag and deployment counters, then rewrites those protected blocks to a pre-crash state.
Recompute the checksum. The module’s firmware uses a CRC or similar checksum to verify memory integrity. After rewriting the crash flag, the checksum must be recalculated and written back correctly — otherwise the module detects the change as corruption and throws new faults.
Verification readback. The memory is read again to confirm the rewrite was successful and the crash flag is cleared.
Bench self-test and simulated arm test. The module is powered through its initialization sequence on the bench. A healthy module will complete its self-test and report ready status. Some services use a bench harness to simulate the vehicle’s SRS network and confirm the module arms correctly.
Return with test report. Reputable services archive the original crash dump and return the module with verification photos or a test report showing successful readback and self-test results.
Modules with water damage, scorched internal components, or failed processors will not pass step 6. When that happens, a trustworthy provider tells you the module needs replacement rather than shipping back a unit that passed a paper process but failed the bench test.
How to remove the SRS module safely before shipping
Whether you’re sending the module to a mail-in bench service or bringing it to a shop, safe removal matters. The SRS system contains pyrotechnic components, and improper handling can trigger accidental deployment or damage the module’s connectors.
Removal safety steps:
Disconnect the negative battery terminal and wait at least 15–20 minutes before touching any SRS component. Most vehicles store enough capacitor charge to deploy an inflator for several minutes after power is cut. For EVs, follow the manufacturer’s high-voltage isolation procedure — EV battery safety steps after a collision differ from conventional vehicles.
Do not probe SRS connector pins with a test light or multimeter. Accidental current through a squib circuit can trigger deployment.
Photograph the module’s label before removal. Capture the part number, VIN reference, and any calibration codes — you’ll need these to confirm compatibility with the reset service before shipping.
Handle the module by its housing, not its connector. Keep it away from static-generating surfaces.
Packing and shipping checklist:
Place the module in an anti-static bag before boxing.
Use a padded box with at least two inches of cushioning on all sides.
Include your contact information, vehicle year/make/model, VIN, and any order or repair form the service requires.
Ship with a tracked and insured carrier. Mark the package as non-hazardous electronics. Do not ship airbag inflators or pretensioners with the module — those are regulated hazardous materials.
Confirm the service’s return shipping policy before you send anything.
Pro Tip: Before shipping, call or email the reset service with your module’s part number and VIN. Confirm they service that specific part number for your vehicle. Some modules — particularly those from certain European luxury brands or newer EV platforms — require manufacturer-specific tools, and not every bench service supports them.
What does a bench reset cost, and what should you expect?
Cost is one of the clearest reasons vehicle owners choose a bench reset over dealer replacement when the module is electrically healthy.
A mail-in bench crash-data clear typically runs in the range of $50–$150 for most domestic and common import modules, though pricing varies by module complexity, vehicle brand, and whether the service includes return shipping. Dealer replacement, by contrast, can run several hundred to well over a thousand dollars once you factor in the part itself, programming, and labor. For luxury and exotic vehicles, dealer replacement costs climb significantly higher.
What affects the price of a bench clear:
Module complexity and vehicle brand (European luxury modules often cost more to service)
Whether VIN verification and coding are included
Return shipping method
Whether the module requires additional programming after clearing
Turnaround expectations:
Most bench services complete the clear within 24–72 hours of receiving the module. Factors that extend that window include high service volume, modules that require additional diagnostic steps, or verification failures that require a second attempt. If a module fails bench testing, a reputable provider contacts you before proceeding — that communication is itself a quality signal.
Warranty and guarantee norms:
Look for providers that offer at minimum:
Documented bench test results confirming the module passed self-test
A money-back or rework guarantee if the module fails after installation (assuming hardware was properly replaced first)
Clear terms on what voids the warranty (physical damage discovered after receipt, improper installation)
Factor
Bench Clear
Dealer Replacement
Typical cost
moderate flat fee
variable higher cost
Turnaround
24–72 hours
Days to weeks (parts availability)
Module condition required
Electrically healthy
Any condition
VIN/coding preserved
Yes
Requires reprogramming
Warranty
Varies by provider
Manufacturer warranty on new part
What are the real risks and limitations of a reset service?
Not every module can be reset, and not every provider offering a reset is doing it correctly. Knowing the limits protects you from wasted money and, more critically, from a vehicle that appears safe but isn’t.
Common limitations and exclusions:
Water or flood damage. Corrosion on the EEPROM chip or connector pins prevents reliable memory access. These modules typically cannot be reset and must be replaced.
Thermal damage from deployment current. The pyrotechnic squib circuits draw high current during deployment. If that current spike burned traces or damaged the internal processor, the module will fail bench self-test regardless of what the memory says.
Cracked or physically compromised housing. Structural damage to the module casing often indicates internal component damage as well.
Failed internal processor. Some modules fail self-test even with clean memory — the processor itself is the problem, not the crash data.
Modules that fail verification. A trustworthy provider refuses to clear modules that fail bench self-tests and documents that decision. That refusal is a sign of integrity, not a service failure.
Fraud and safety risks to watch for:
Legitimate services require you to confirm that deployed components have been replaced. They do not advertise “no questions asked” clears or promise to make a salvage-title vehicle look clean. If a provider’s pitch sounds more like odometer fraud than collision repair, walk away.
How to verify a provider is doing it right:
Ask whether they photograph and archive the original EEPROM dump before clearing
Request a sample test report showing bench self-test results
Confirm they will contact you if the module fails verification rather than shipping it back anyway
Check that they verify module fitment against your VIN before accepting the job
How do you choose a legitimate reset provider or collision shop?
The checklist below gives you a practical framework for evaluating any bench-clear service or collision shop before you commit.
Provider checklist:
Documented verification steps (bench test, EEPROM readback, self-test report)
VIN and part-number compatibility check before accepting the module
Clear warranty terms in writing (money-back or rework policy)
Sample test report available on request
Stated turnaround time with communication if delays occur
Transparent pricing with no hidden fees for shipping or programming
Explicit policy of refusing to reset physically damaged or flood-damaged modules
Questions to ask before you ship or authorize work:
Do you archive the original crash dump before clearing?
Do you provide a bench test photo and verification readout with the returned module?
What is your warranty if the module fails after installation?
Do you confirm part-number and VIN compatibility before starting work?
What happens if my module fails bench self-test?
Red flags that should stop you:
No verification paperwork offered
Refusal to confirm module fitment against your VIN
Price significantly below market with no explanation of process
No stated policy on modules that fail testing
Claims to reset any module regardless of physical condition
ADAS calibration is a related step that often gets overlooked at this stage. If the collision affected radar, camera, or ultrasonic sensors, those systems need recalibration after the physical repair — and that work must be completed before the vehicle is returned to the road.
Why coordinated repair and ADAS calibration matter after a deployment
The reset is the final step of a collision repair workflow, not a standalone fix. That distinction matters practically, not just philosophically.
Before a module can be legitimately reset, a qualified shop must have replaced every deployed inflator, every fired pretensioner, and every damaged impact sensor. Wiring harnesses that absorbed deployment current need inspection. Mounting brackets that absorbed crash energy need structural assessment. What happens behind the bumper after a rear-end collision illustrates how much hidden damage a crash can produce — damage that affects SRS sensor placement and function even when it isn’t visible from the outside.
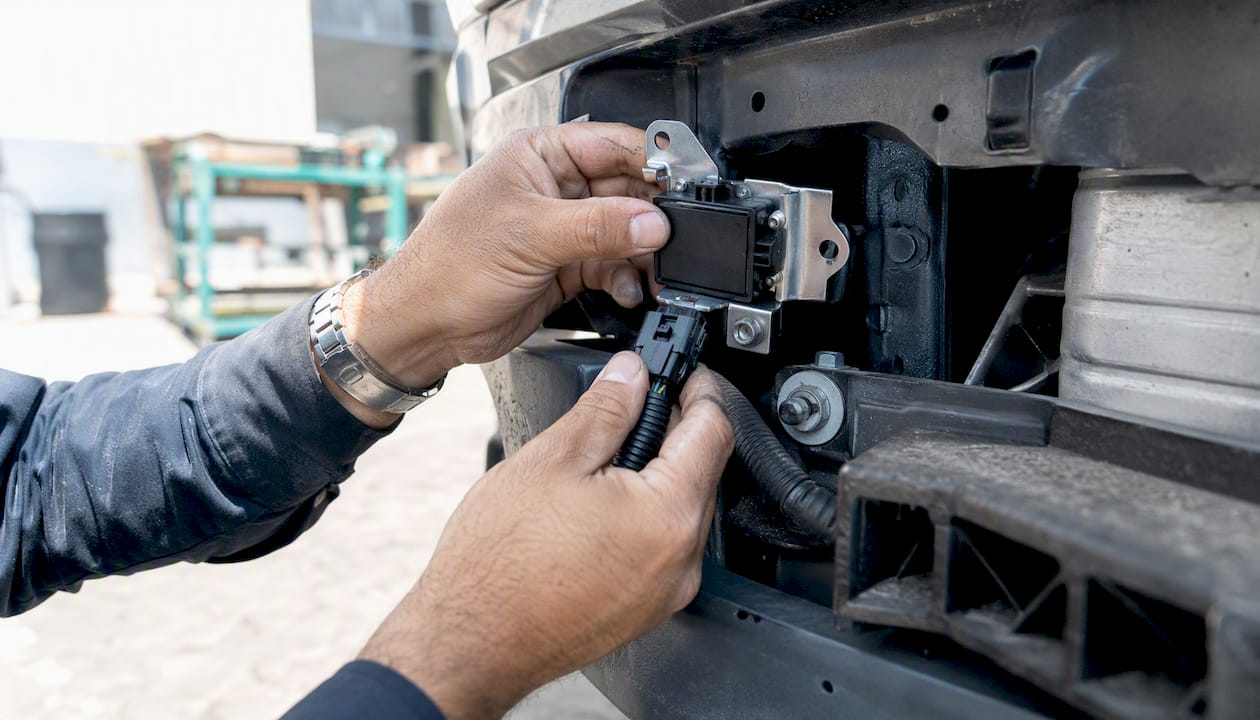
After the hardware is right, ADAS dependencies come into play. Modern vehicles integrate the SRS module with forward collision warning, automatic emergency braking, and occupant classification systems. If any of those sensors were displaced or damaged in the crash, the module’s self-test may pass on the bench but flag faults once the vehicle’s full network is live. Proper ADAS calibration after collision repair is what closes that gap.
Car Geeks Collision handles the complete post-accident workflow: OEM-procedure hardware replacement, structural repair, ADAS calibration, and module verification. That single-shop approach means documented repair records at every step, no handoffs between vendors, and a workmanship warranty that covers the full scope of work.
Pro Tip: Ask your collision shop to provide a written repair order listing every SRS component replaced, with part numbers. That document is what a bench service needs to confirm the reset is legitimate — and what your insurer needs if a claim question arises later.
Why we never reset before the repair is done
Every vehicle that comes through our shop after a deployment goes through the same sequence: inspect, document, replace hardware, verify wiring, then — and only then — address the module. We’ve seen modules come in from other shops where the crash data was cleared but the pretensioners were never replaced. The SRS light was off. The car looked fine. The restraint system was completely non-functional.
What we look for in a healthy module before sending it for a bench clear: no visible housing damage, no corrosion on the connector pins, no evidence of heat damage near the squib circuits, and a clean visual inspection of the mounting area. If anything raises a flag, we recommend replacement rather than clearing — because a reset on a compromised module is not a repair, it’s a risk transfer to the driver.
The warranty and verification process is what makes a reset safe. When a bench service returns a module with a documented test report and a money-back guarantee, and our shop has a complete repair order showing every replaced component, the vehicle owner has a documented chain of accountability from crash to road-ready. That’s the standard we hold ourselves to, and it’s the standard you should expect from any shop handling your vehicle after a deployment.
Car Geeks Collision handles the full post-accident workflow
After a deployment, the last thing you need is to coordinate three separate vendors for body repair, SRS hardware replacement, and module verification. Car Geeks Collision handles the complete post-accident workflow under one roof in South Florida: collision repair and auto body services using OEM procedures, ADAS sensor calibration, VIN-matched part handling, and full module verification before your vehicle leaves the shop.
The practical benefit is a single documented repair record covering every step — hardware replacement, structural repair, sensor calibration, and module verification — backed by our lifetime workmanship warranty. No handoffs, no gaps in the paper trail, and no question about whether the reset was performed on a properly repaired vehicle.
If you’re not sure whether your module needs a bench clear or full replacement, text us your part number and VIN for a fitment confirmation, or schedule an inspection and bring the vehicle in for a complete repair estimate. We also offer courtesy towing for vehicles that aren’t drivable after a crash.
Sources
FAQ
Can I reset my own airbag module at home?
Not safely or effectively. Hard crash data is stored in non-volatile EEPROM that requires bench-level hardware access to rewrite — a standard OBD-II scanner cannot reach it. Attempting DIY EEPROM edits without the right tools risks corrupting the module entirely.
How much does it cost to reset an SRS module?
Most mail-in bench crash-data clears run $50–$150 for common domestic and import modules. Dealer replacement can be considerably more expensive depending on the vehicle, making a bench clear the more cost-effective option when the module is electrically healthy.
Can AutoZone reset an airbag light after a crash?
AutoZone’s scan tools can read and clear soft SRS fault codes, but they cannot clear hard crash data written to the module’s non-volatile EEPROM. If the SRS light came on during a deployment event, a retail scanner will not resolve it.
How do you know if an airbag module is bad and needs replacement instead of a reset?
A module that shows physical damage — cracked housing, corrosion on connector pins, burn marks from deployment current, or evidence of water intrusion — typically cannot be reset and needs replacement. A reputable bench service will identify these conditions during inspection and inform you before proceeding.
How do you verify the reset worked after reinstalling the module?
After installation, a qualified technician scans the vehicle with a bi-directional scan tool to confirm no SRS fault codes are present and the system reports ready status. The SRS warning light should extinguish during the ignition cycle’s self-test and stay off. If any codes return, the module or a connected sensor requires further diagnosis.
Recommended