
Blog
Inspect, Map, Decide: Quarter Panel Replacement for EVs and ADAS
Inspect, map, decide: learn when to repair or replace a quarter panel, typical cost ranges, and how ADAS and EV construction change the repair plan.
A crease with paint still intact usually calls for paintless dent repair or filler, not a new panel. Torn metal, rust perforation, or damage that reaches the inner wheelhouse changes that math fast. If you can’t tell which category your damage falls into, measure it, photograph it from several angles, and get it in front of a shop with access to OEM repair data before deciding anything.
TL;DR:
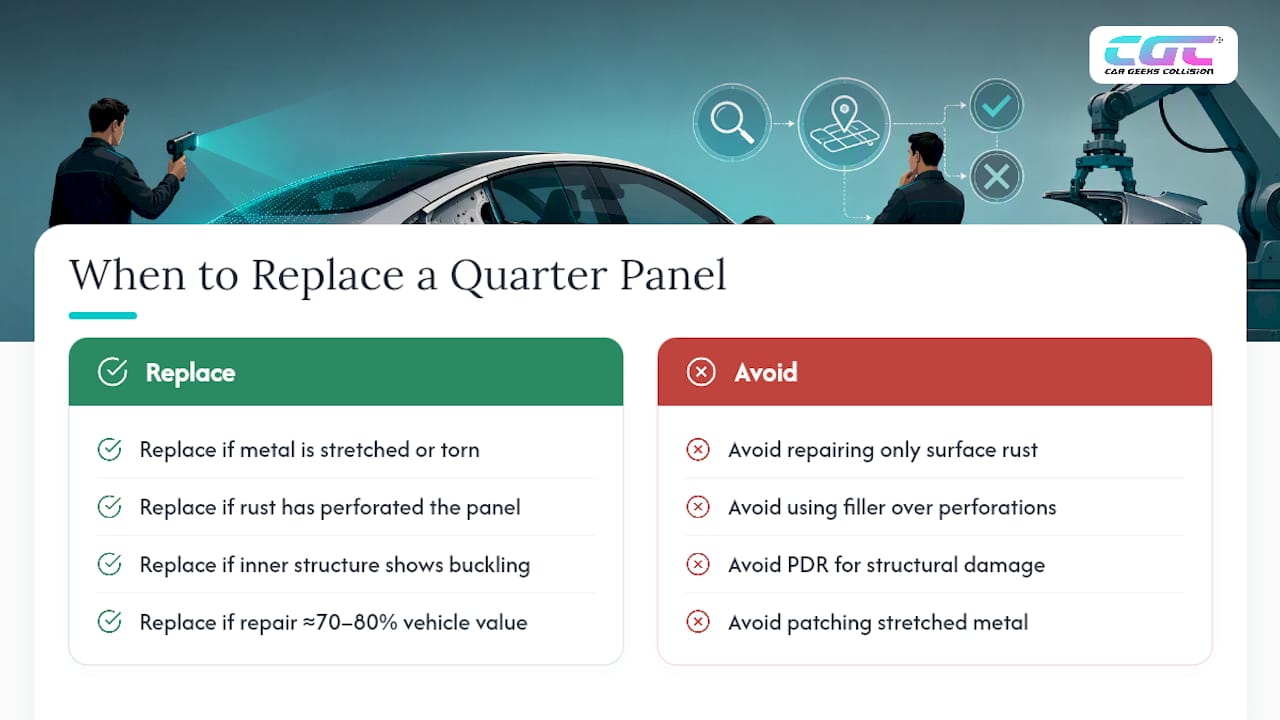
Damage involving torn metal, rust perforation, or structural issues demands full panel replacement rather than repair or filler.
Replacing a quarter panel involves precise OEM procedures, controlled welding, seam sealing, and proper calibration for modern sensors.
Costs range from $1,000 to several thousand dollars, with ADAS recalibration adding about $150 to $400 when sensors are in or near the repair area.
Aftermarket panels can save money but often require adjustment for fitment, and salvage yard panels are a budget option if rust-free.
For high-value or heavily damaged vehicles, repair estimates approaching 70-80% of the vehicle’s value may lead insurers to declare a total loss instead.
Table of Contents
Repair Options at a Glance: PDR, Filler, Sectioning, or Full Replacement
What Does Quarter Panel Replacement Cost and How Long Does It Take?
Why ADAS Calibration and EV Construction Change the Repair Plan
Repair Options at a Glance: PDR, Filler, Sectioning, or Full Replacement
Most quarter panel damage falls into one of four buckets, and matching the right method to the right damage saves you from paying for work you don’t need.
Paintless dent repair (PDR) massages metal back into shape from behind the panel without touching the paint. It only works when the paint hasn’t cracked and the metal hasn’t stretched.
Body filler and spot repair fills shallow dents or small creases, then gets blended into the surrounding paint. It’s fast and cheap, but it’s cosmetic. It won’t fix compromised structural metal.
Panel sectioning replaces a damaged section of the quarter panel at a factory-approved seam, leaving the rest of the original panel in place. Shops generally prefer this over full replacement whenever a sectioning point exists in the OEM repair procedure, since it disturbs fewer surrounding panels and factory welds.
Full quarter panel replacement removes the entire panel and welds in a new one. It’s the answer for crumpled metal, rust that’s eaten through the panel, or damage extending into the wheelhouse.
Here’s the quick-reference version:
PDR: best for shallow dents with intact paint, no filler needed, fastest turnaround
Filler/spot repair: best for small dings and shallow creases, moderate durability
Sectioning: best for damage confined to a repairable zone with a factory seam nearby
Full replacement: best for crumple damage, torn metal, rust-through, or structural compromise
When Does a Quarter Panel Actually Need Replacing?
The clearest sign a panel needs to come off entirely, rather than get patched, is stretched or torn metal. When sheet metal absorbs an impact beyond its elastic limit, it thins out and loses its original strength even if a technician manages to hammer it back into a visually acceptable shape. That thinned metal is more prone to future cracking and won’t hold paint the same way twice.
Rust tells a similar story, but it’s easy to misjudge. Surface rust on an otherwise sound panel can be sanded, treated, and painted over. Rust perforation, meaning rust that has eaten a hole clean through the metal, is a different problem entirely. Filler over a perforated area looks fine for a season or two, then bubbles and fails as moisture works its way back through the compromised metal from behind.
Because quarter panels are spot welded directly to the unibody rather than bolted on like a fender, damage doesn’t always stop at the visible skin. Inspect the inner wheelhouse, the trunk drop-off panel, and the rear body mounts for buckling, torn seam sealer, or misaligned gaps. Any of those signs point to structural involvement that filler and PDR simply cannot address, and that labor-intensive welded construction is exactly why quarter panel work costs more than repairs to bolt-on parts.
Insurance economics play into the decision too. Once repair estimates climb toward roughly seventy to eighty percent of a vehicle’s value, carriers frequently total the car rather than authorize the repair. Structural quarter panel replacement on an older or higher-mileage vehicle can push an estimate right up to that line, so it’s worth asking your adjuster early where your vehicle sits relative to that threshold.
How Is a Quarter Panel Replaced Step by Step?
A correct replacement follows a controlled sequence, not a rush job with a cutoff wheel. Skipping steps is how panels end up misaligned, rippled, or rusting from the inside within a couple of years.
Assess and support the vehicle. Technicians measure the body against factory geometry specs before cutting anything, using bracing to prevent the unibody from shifting once the damaged panel is removed.
Drill out spot welds and mark cut lines. The old panel comes off at factory-approved seams or sectioning points, following OEM repair data rather than an arbitrary line.
Test-fit the new panel or section. Reproduction panels especially need a dry fit first, with gaps and contours checked against the surrounding sheet metal before any welding starts.
Weld using controlled heat. Tack welds go in first, followed by skip or stitch welding in short segments with cooling pauses between passes. This staged approach to thermal control prevents the warping that comes from running one long continuous bead.
Apply seam sealer and corrosion protection. Seams get sealed, and cavity wax goes into enclosed areas that will never be visible again once the panel is buttoned up.
Prep, blend, and reassemble. Paint gets blended into adjacent panels to avoid a visible edge, then trim, lighting, and body components go back on with a final alignment and water-leak check.
Classic car restorers see this workflow in its most demanding form. A well-documented 1967 Camaro quarter panel install using a reproduction panel required multiple full days of fitting and metalwork before the panel was ready to weld, which tells you a lot about why shops quote replacement jobs in days, not hours.
What Does Quarter Panel Replacement Cost and How Long Does It Take?
Price and timeline both depend heavily on which of the four repair methods applies, so a fair comparison means knowing which bucket your damage falls into before you start calling shops.
PDR: roughly $150 to $400, often completed in 1 to 3 hours
Filler and spot repair: roughly $300 to $900, typically 1 to 2 days
Panel sectioning: costs vary widely depending on the damaged section’s size and can reach into the low thousands
Full replacement: roughly between one thousand and several thousand dollars with OEM parts and paint, usually 3 to 5 business days or longer once hidden damage surfaces
ADAS recalibration generally adds a few hundred dollars on top of those figures whenever a rear-mounted sensor, camera, or blind-spot radar sits near the repair area, and that step isn’t optional on most vehicles built in the last several years.
Paint blending is where labor hours quietly stack up. Matching a metallic or pearl finish across a curved panel takes real skill, and a mismatched blend is one of the most common sources of comebacks in the entire industry. Don’t be surprised if a shop asks to open the trunk or wheel well before finalizing a quote, either. Teardown routinely reveals rust or bent structural members hiding behind the visible damage, and a supplement to the original estimate is normal, not a red flag, when it’s documented with photos.
Why ADAS Calibration and EV Construction Change the Repair Plan
Quarter panel work on a modern vehicle rarely ends with the last coat of clear. Rear cross-traffic alert radar, blind-spot monitoring sensors, and backup cameras are frequently mounted in or near the quarter panel and bumper cover, and disturbing that area almost always requires recalibration afterward. Our ADAS calibration guidance covers why this step exists, and the short version is that a sensor bumped even a few millimeters out of alignment can misread distance and braking cues. Specialized calibration equipment and target setups are required to do it correctly, which is exactly why not every collision shop offers it in house.
EVs and luxury vehicles raise the stakes further. Battery packs, structural adhesives, and high-voltage wiring routed near the rear quarter section mean a shop needs OEM procedures and the right tooling, not general body shop instinct, to work near that area safely.
Pro Tip: Ask any shop quoting quarter panel work to show you the OEM repair procedure for your specific vehicle and a calibration receipt from the recalibration equipment they used, not just a verbal assurance that “it’s been checked.”
Before you sign off on a repair near ADAS components, confirm the shop can address:
Rear-facing radar and blind-spot monitoring sensors
Backup and surround-view cameras mounted in the bumper or panel area
Parking sensors embedded in the quarter panel or bumper cover
Battery enclosure clearance and structural adhesive bonds on EVs
Can You Replace a Quarter Panel Yourself?
Minor paintless dent repair and small filler touch-ups are within reach for a patient DIYer with the right tools and a low-stakes panel. Full replacement is a different animal, and it’s where most weekend projects go sideways.
Welding sheet metal to a unibody without proper heat control warps panels and weakens the structure around the weld. A DIYer without a MIG welder rated for automotive gauge steel, a frame rack or measuring system, and a spot weld drill will struggle to hit factory tolerances even with patience and good intentions.
The most common DIY mistakes: over-reliance on filler to mask a poor metal fit, skipping seam sealer and cavity wax (which invites rust within a year or two), and welding without test-fitting the panel first, which locks in gaps that are nearly impossible to correct afterward.
Reasonable DIY: small PDR, minor cosmetic filler on non-structural dings
Leave to a shop: any welding, sectioning, or full panel replacement
Minimum shop capability to look for: OEM repair data access, a proper welder for automotive steel, and frame measuring equipment
Stop and call a pro when: you find torn metal, rust-through, or any deformation reaching the wheelhouse or trunk floor
How Do You Choose a Body Shop and Handle Insurance?
A good shop will show its work before you commit to it, not just quote a number over the phone.
Ask direct questions. Does the shop pull OEM repair procedures for your make and model? Can they perform ADAS calibration in house, or do they sub it out? What warranty backs the welding and paint work?
Watch for red flags. Heavy reliance on filler instead of metalwork, no mention of OEM data, and no calibration paperwork after sensor-adjacent repairs are all signs to walk away.
Compare estimates line by line, not just by the bottom number. A lower quote that skips seam sealing or corrosion protection isn’t actually cheaper once rust sets in.
Expect supplements. A written supplement after teardown, backed by photos of newly discovered damage, is standard practice, not padding.
Run the total-loss math yourself. If your estimate is approaching 70 to 80 percent of your car’s value, ask your adjuster directly whether a total-loss declaration is likely before you invest emotional energy in the repair.
OEM, Aftermarket, or Donor Panel: Which Should You Choose?
OEM panels fit as designed and carry manufacturer specs, but they cost the most. Aftermarket reproduction panels cost less and work well for many older or high-volume models, though quality varies by manufacturer. Donor panels pulled from a salvage yard can be a budget option for rare vehicles, provided rust and prior damage are ruled out first.
The recurring complaint with reproduction panels is fitment. Panels that don’t match factory contours need correction before welding, and skipping that step leads to thick filler lines and visible waves in the finish later. Ask any shop in writing how they handle seam sealing and corrosion protection on whatever panel you choose, regardless of source.
Our Take at Car Geeks Collision
We build every quarter panel repair around OEM repair procedures, not shortcuts, because sectioning points and weld patterns exist for structural reasons, not just cosmetic ones. Our shop performs ADAS calibration in house rather than sending it out, which matters more with every model year as sensors multiply. We work extensively on EVs and luxury vehicles where battery placement and structural adhesives demand more than general body shop instinct, and every repair carries a lifetime workmanship warranty along with insurance coordination to keep the claims process from becoming a second job for you. We’ve documented more of this process on our collision repair blog.
— Car Geeks Collision
Get an Estimate for Your Quarter Panel Repair
If your damage falls into torn metal, rust-through, or structural territory, this isn’t a project to hand off to guesswork or a shop that skips OEM data. Car Geeks Collision handles the full range, from OEM-aligned panel sectioning and replacement to ADAS calibration, EV body repair, and insurance coordination, so you get one point of contact instead of juggling an adjuster, a parts supplier, and a calibration specialist separately.
Our auto body repair services cover everything from filler and spot repair up through full structural replacement, and our EV body repair team works on Tesla and other electric platforms with battery and sensor placement in mind. We also offer courtesy towing and loaner vehicles when available, so a damaged quarter panel doesn’t leave you stranded while parts come in. If you’re in Hollywood, Fort Lauderdale, Miramar, or elsewhere in South Florida, request an inspection and get a written estimate before you decide between repair and replacement.
Sources
Car quarter panel repair costs: method and price ranges | TheCarBuzz
How to install a new quarter panel on a 1967 Camaro - Hot Rod
Quarter Panel & Body Panel Replacement Guide | Silver Lining Auto Restoration
FAQ
How much does it cost to have a quarter panel replaced?
Full replacement typically runs between one thousand and several thousand dollars depending on whether you use OEM or aftermarket parts, with ADAS recalibration adding $150 to $400 when sensors are involved.
Can a quarter panel be replaced?
Yes. Quarter panels are welded to the unibody rather than bolted on, so replacement involves drilling out spot welds, welding in a new panel or section, sealing seams, and blending paint into adjacent panels.
What is the average cost to replace a front quarter panel?
Costs generally fall in the same $1,000 to $3,000+ range as rear quarter panel replacement, though the final price depends on parts sourcing, paint complexity, and whether nearby sensors need recalibration.
Is replacing a quarter panel worth it?
It’s worth it when the damage involves torn metal, rust perforation, or structural compromise that filler and PDR can’t fix, but if your total estimate approaches 70 to 80 percent of the vehicle’s actual cash value, your insurer may declare it a total loss instead of covering the repair.
Recommended